# Log In
This guide introduces how to initialize JC SDK and log in.
# Initialize
Call
JCClient.create (opens new window)
on the main thread to create a
JCClient (opens new window)
instance object. Pass in the obtained appKey to initialize the
JCClient (opens new window):
// JCClient object
JCClient mClient;

// Initialization function
public boolean initialize(Context context) {
    // Login class
    mClient = JCClient.create(context, "User appKey", new JCClientCallback() {
        @Override
        public void onLogin(boolean result, int reason) {

        }
        @Override
        public void onLogout(int reason) {

        }
        @Override
        public void onClientStateChange(int state, int oldState) {

        }
    }, null);
    // Get the initialization state (used to judge the initialization state)
    mInit = mClient.getState() == JCClient.STATE_IDLE;
    return mInit;
}
After successful initialization, the state of JCClient.ClientState changes from JCClientStateNotInit (not initialized) to JCClientStateIdle (not logged in).
# Initiate login
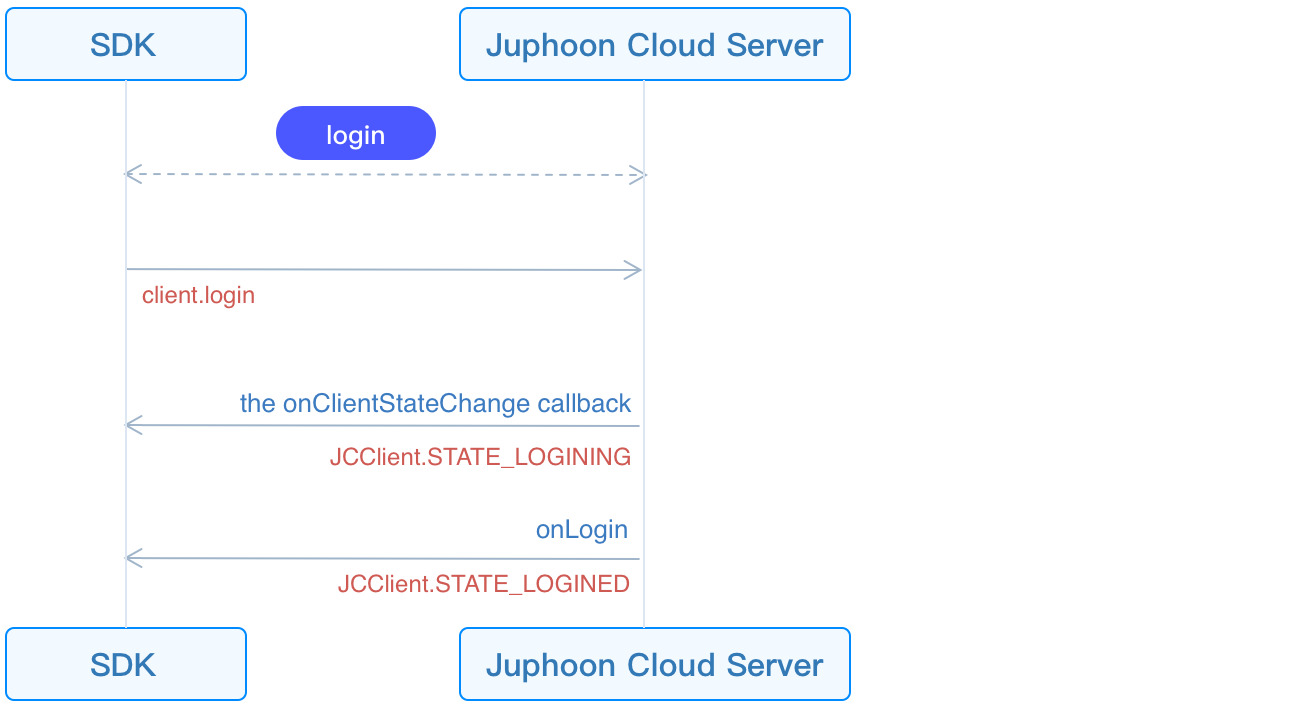
After the SDK is initialized, login integration is possible. The call flow of the login interface is as follows:

First create a JCClient.LoginParam (opens new window) instance to adjust the login parameters. Then call login (opens new window) to initiate login:
JCClient.LoginParam loginParam = new JCClient.LoginParam();
// 1. Set the server environment.
loginParam.serverAddress = "Server address";
// 2. Initiate login
mClient.login(userID, password, loginParam);
TIP
Environment settings:
Domestic environment
http:cn.router.justalkcloud.com:8080(Default)International environment
http:intl.router.justalkcloud.com:8080
userID is English, numbers and
+-_., case-insensitive, the length should not exceed 64 characters,-_.cannot be the first character.password the length should not exceed 128 characters.
When calling this interface returns true, it only means that the interface is called successfully, not that the login is successful. The result of the login will be reported through the onLogin callback.
After the interface is successfully called, the login state change callback onClientStateChange (opens new window) will be triggered first. You can perform logical operations by overriding onClientStateChange (opens new window):
@Override
public void onClientStateChange(@JCClient.ClientState int state, @JCClient.ClientState int oldState) {
     if (state == JCClient.STATE_IDLE) { // Not logged in
        ...
    } else if (state == JCClient.STATE_LOGINING) { // Logging in
        ...
    } else if (state == JCClient.STATE_LOGINED) { // Login successful
        ...
    } else if (state == JCClient.STATE_LOGOUTING) { // Logout
        ...
    }
}
Then trigger the onLogin (opens new window) callback. You can perform logical operations by overriding onLogin (opens new window):
@Override
public void onLogin(boolean result, @JCClient.ClientReason int reason) {
    if (result) {// Login successful
        ...
    }
    if (reason == REASON_AUTH) {// Account password is wrong
        ...
    }
}
After the login is successful, the SDK will automatically maintain the connection status with the server until the user actively calls the logout interface, or the device is logged out because the account is logged in on another device. Login success/failure reason Refer to JCClient.ClientReason (opens new window).
# Log out
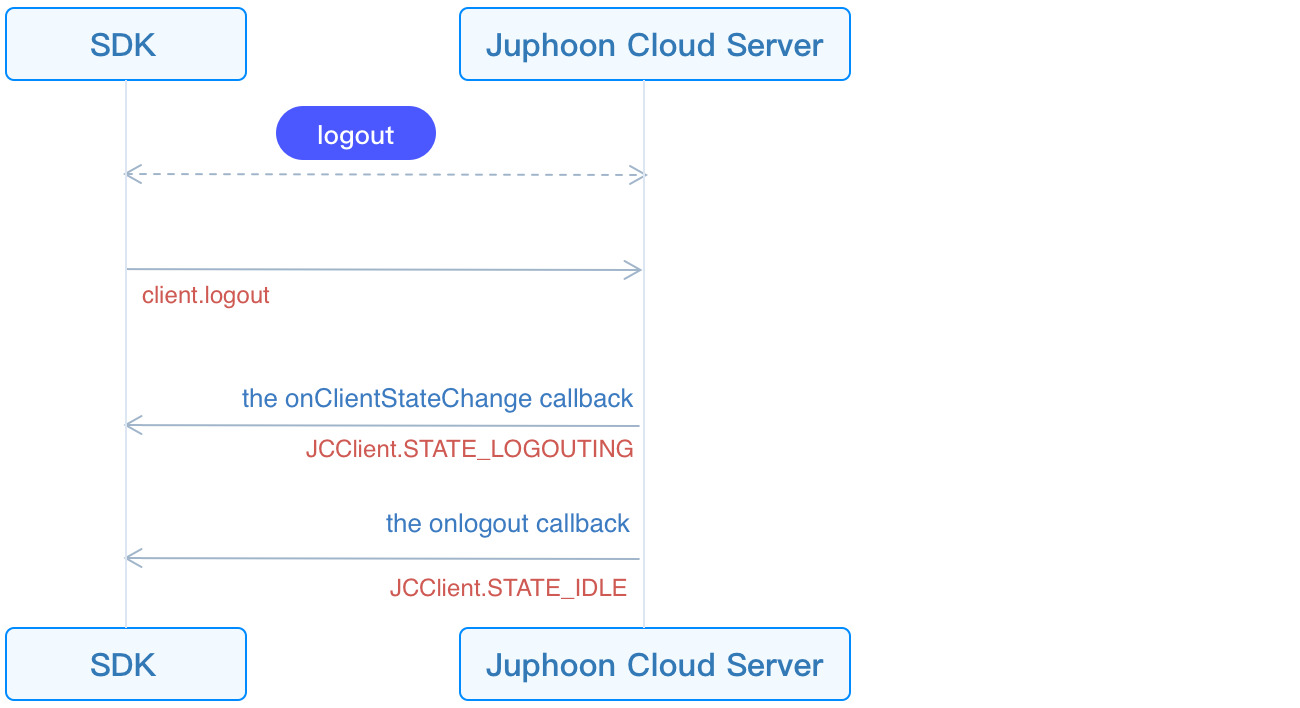
The call flow of the logout interface is as follows:

Call logout (opens new window) to initiate logout. More logout reasons reference: JCClient.ClientReason (opens new window):
@Override
public void onLogout(@JCClient.ClientReason int reason) {
    if (reason == REASON_SERVER_LOGOUT) {// Force logout
        ...
    }
}

